User Model
Introduction
We can simply make our User models in a basic way that Django explains. However, it would be much better if we could avoid making new fields manually and import all information fields that we can think of when it comes to "Users". In this section, let's see how we can make our custom User models in sexier way.
Django is giving us two different ways (opens in a new tab) as follows:
- Expanding (opens in a new tab) from from the current User model
- Replacing (opens in a new tab) the current User model
Expanding
The basic methodology is that we are going to define secondary classes that we would like to add or change,
and then expand those classes from User class from django.contrib.auth.models.
Inheriting User class
Let's import User class first.
If we dig into codes of User class, we can find out that it is inherited from AbstractUser, which we will see later.
Therefore, it provides basic required fields such as username and password with some other optional fields.
Creating secondary classes
Now it's time to define secondary classes with which we want to connect User class.
For instance, when we are thinking about E-commerce platform, we can think of customers who visit platform and admin users who control platform.
Let's make this happen with our code.
Creating Customer class
If we want to change information within User class,
We can use OneToOneField (opens in a new tab) to connect Customer class with User class.
Then, we can define further extra fields to attach to Customer class.
In this case, I newly added address field.
Creating Admin class
I created Admin class for admin users.
As we did in previous section, I made admin_user property and connected it with User using OneToOneField field.
To set this user as admin, I created BooleanField (opens in a new tab) called is_admin.
Registering into admin.py
Let's register our models into admin.py.
We will be using InlineModelAdmin (opens in a new tab) method.
I imported UserAdmin (opens in a new tab) within User class with giving alias as BaseUserAdmin
and connected to UserAdmin class after creating it.
Creating CustomerInline Admin model
I created CustomerInline Admin model to connect with Customer model.
- Connect
Customermodel withmodel(opens in a new tab) property. - I set
can_delete(opens in a new tab) asFalseso that users won't be deleted.Setting value for
can_deletemay rely on your service policy. I just followed what it showed on the official documentation but if you need to let admin users delete users (whatsoever), then you may set it asTrue. - Set value of
verbose_name_plural(opens in a new tab) when we have multiple users.
Creating AdminInline Admin model
It goes same with Admin model class as we exactly did previously.
Connecting UserAdmin Admin model class
I inherited BaseUserAdmin to UserAdmin Admin class
and then connected CustomerInline and AdminInline.
We will be using InlineModelAdmin (opens in a new tab) method.
I imported UserAdmin (opens in a new tab) within User class with giving alias as BaseUserAdmin
and connected to UserAdmin class after creating it.
Creating CustomerInline Admin model
I created CustomerInline Admin model to connect with Customer model.
- Connect
Customermodel withmodel(opens in a new tab) property. - I set
can_delete(opens in a new tab) asFalseso that users won't be deleted.Setting value for
can_deletemay rely on your service policy. I just followed what it showed on the official documentation but if you need to let admin users delete users (whatsoever), then you may set it asTrue. - Set value of
verbose_name_plural(opens in a new tab) when we have multiple users.
Result
You will be able to see as below once you started your server.
we can put address field information that is defined at Customer class
and is_admin field information that is defined at Admin class, respectively.
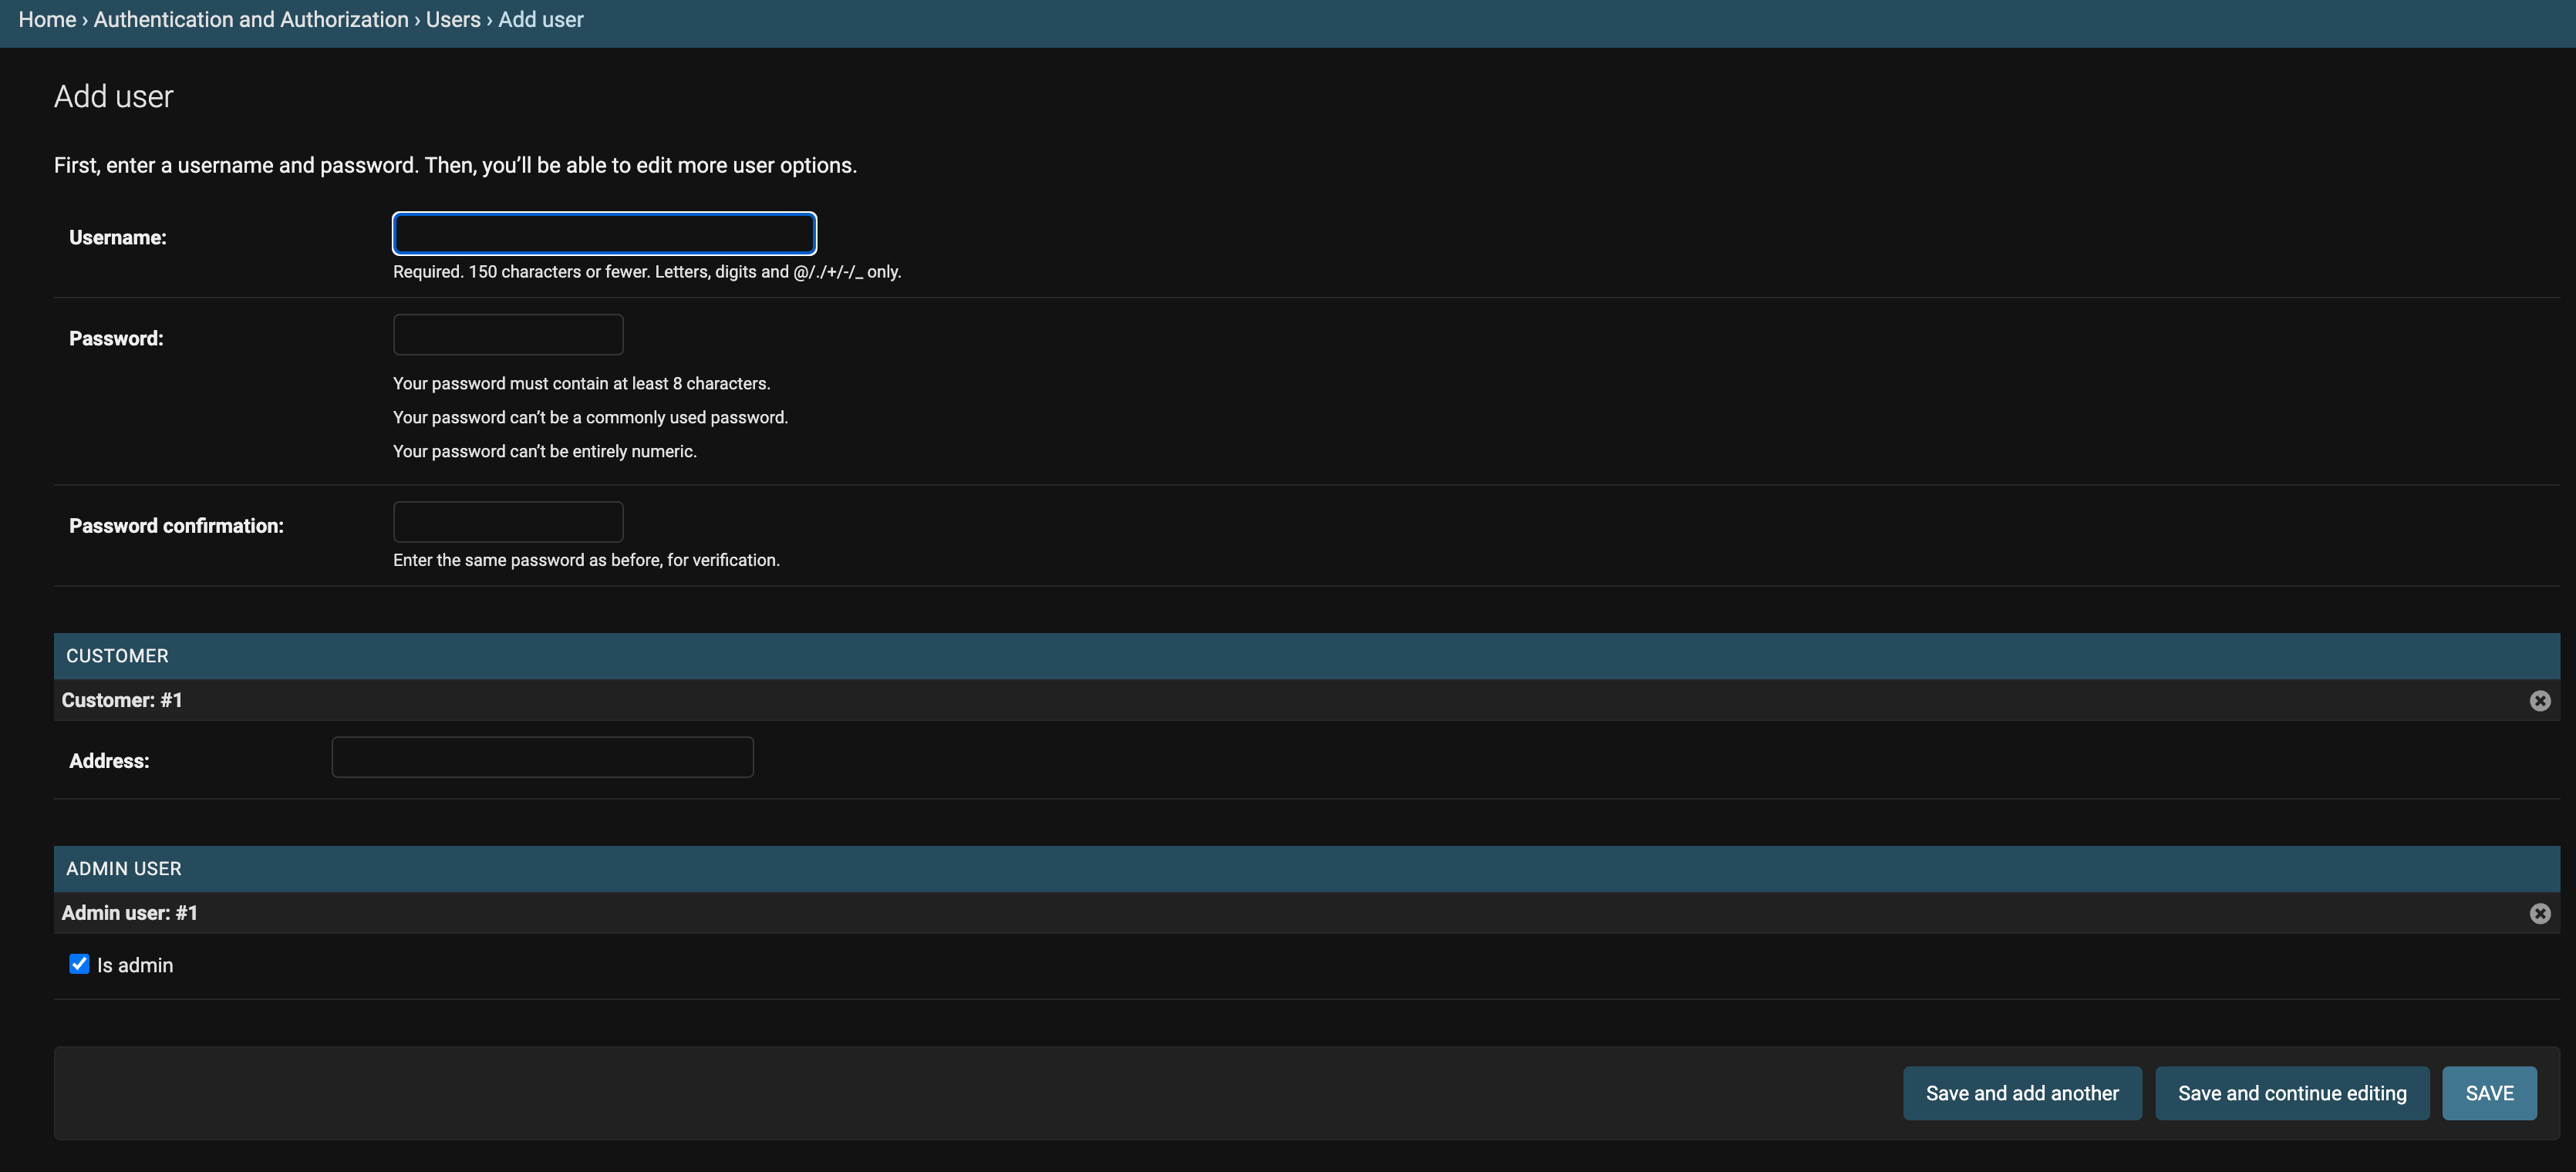
After we fill out all necessary information, you will be redirected to the page where we can put secondary information.
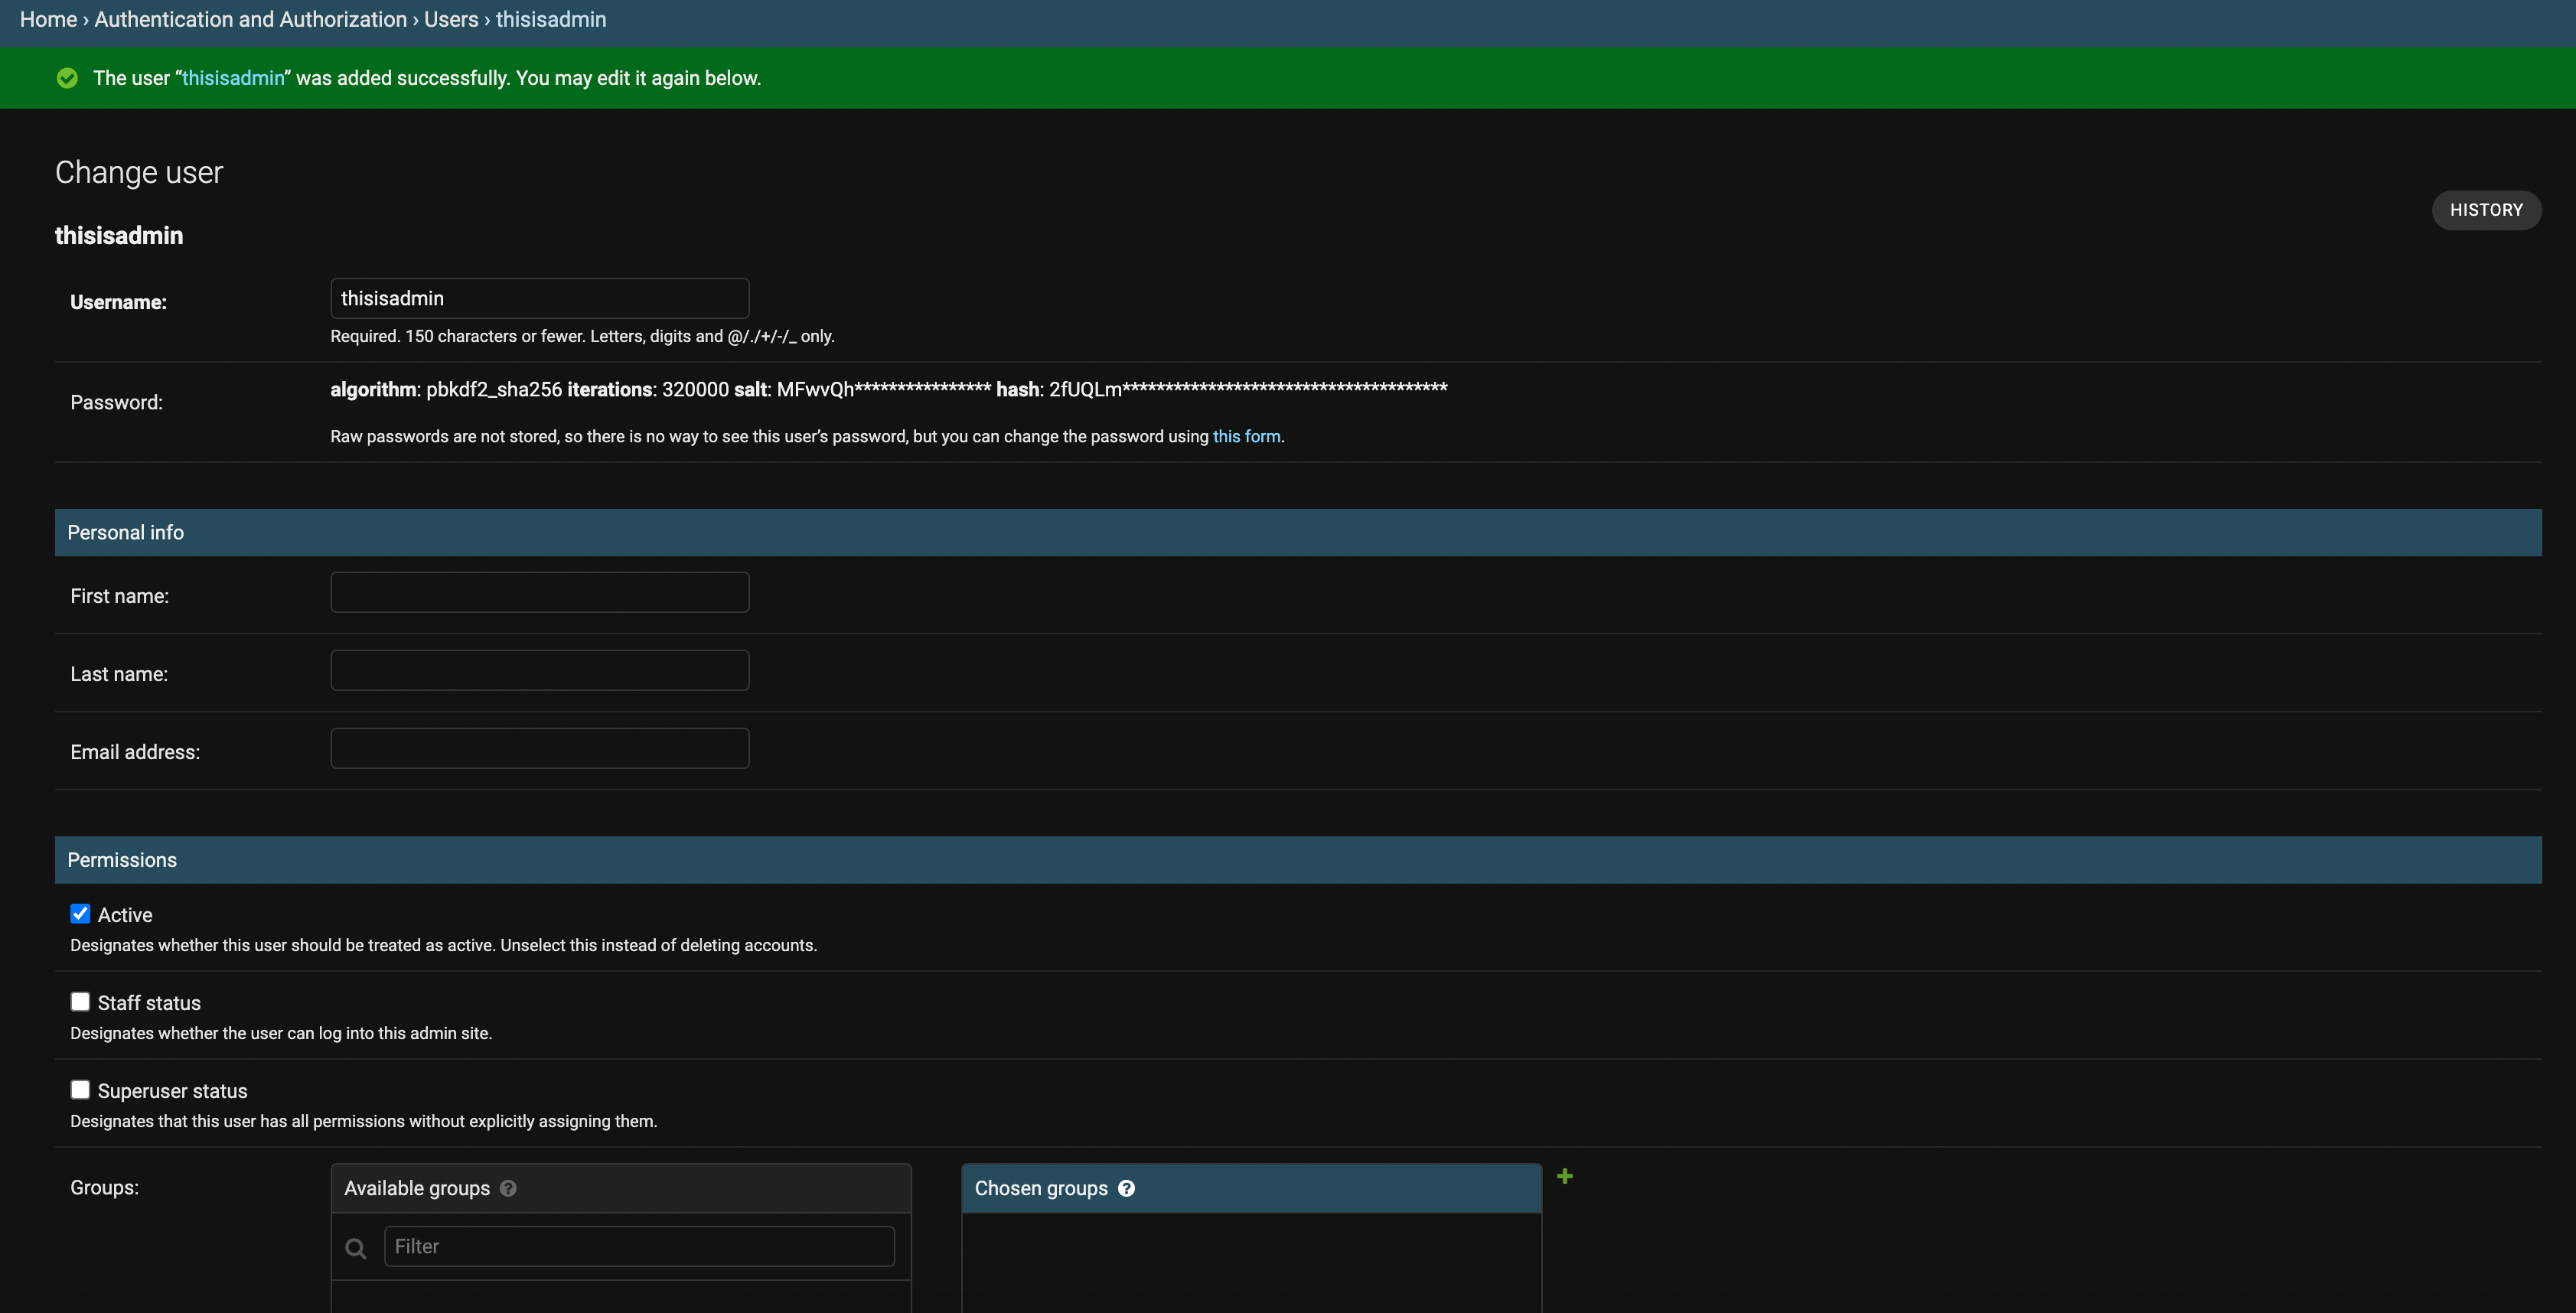
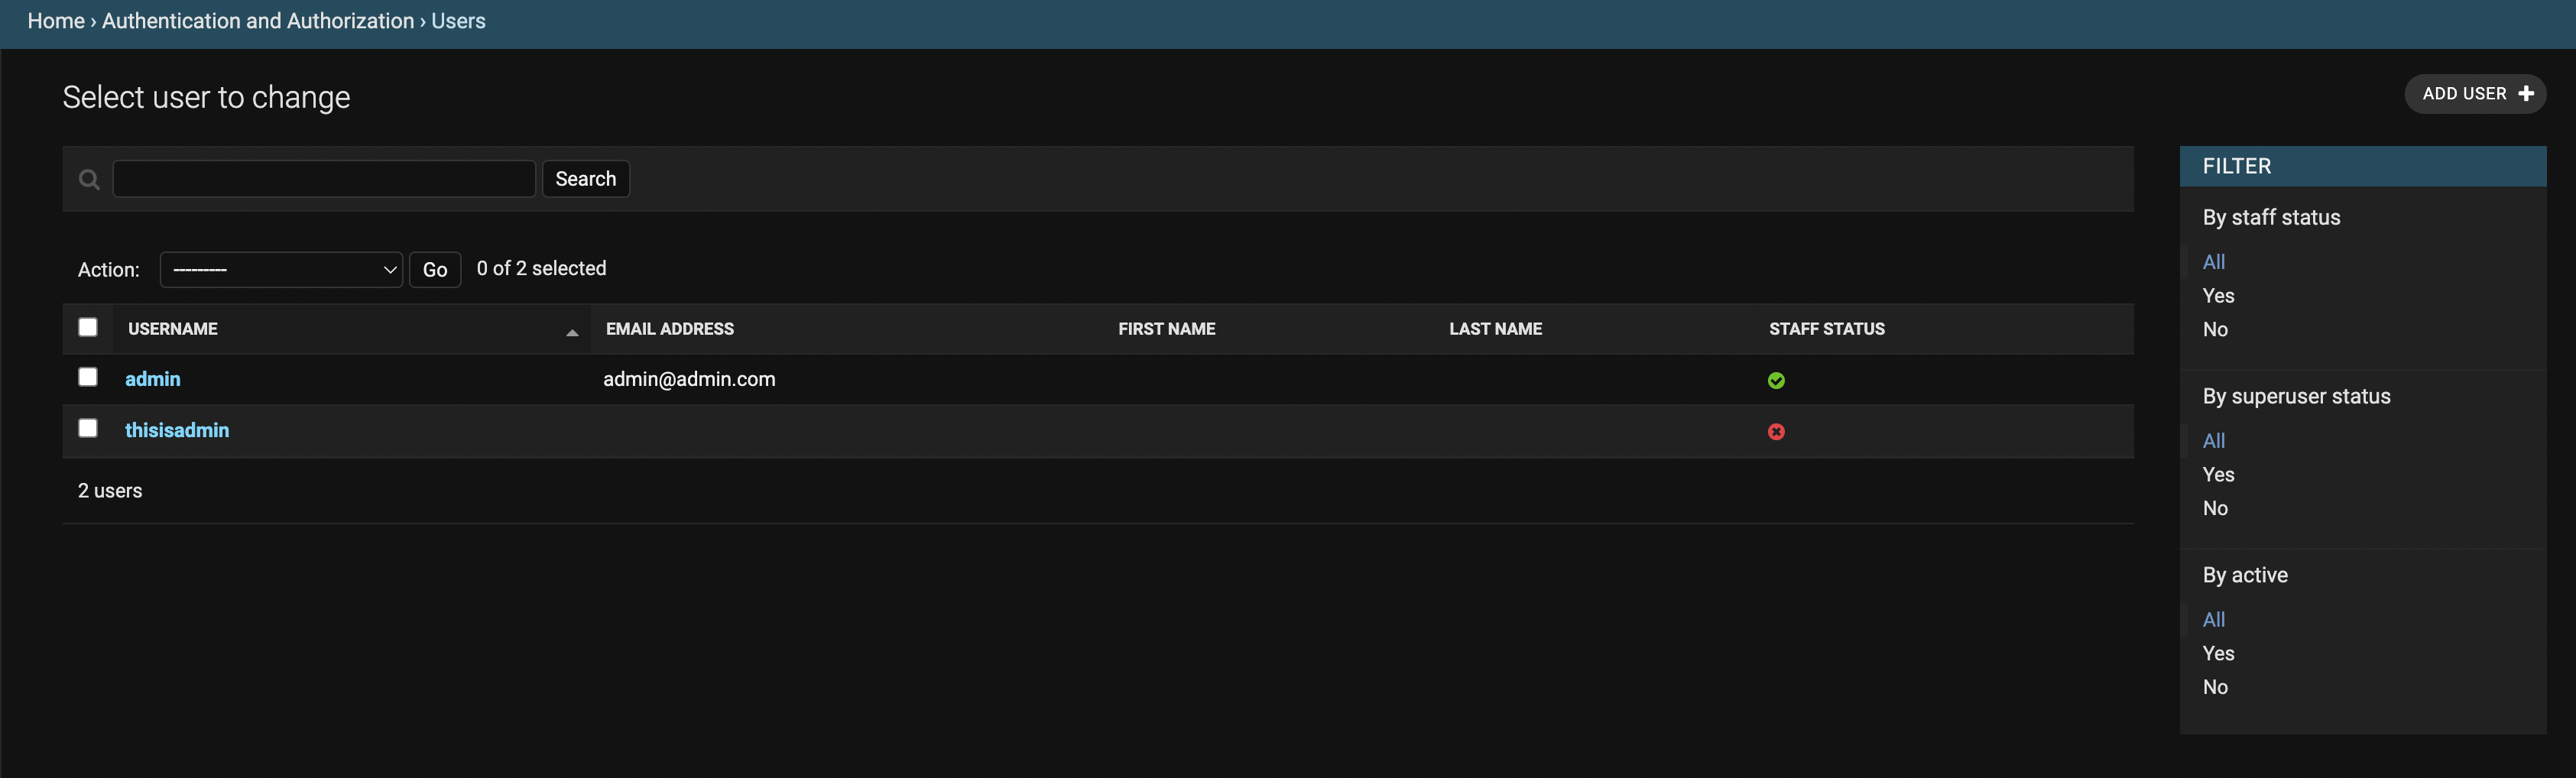
Finally, we can see the result page at Django admin page as below:
Replacing (AbstractUser)
Let's try with replacing method. We can try in two ways:
AbstractUser basically kind of sample model class that consists of users' information.
If necessary, you are more than welcomed to include or replace fields by overriding model.1
Creating User Model Class
Let's create User model class.
Be sure to include AbstractUser into User class.
Configuring Fields
Configure necessary fields.
For profile_picture, as we will let users to send their profile pictures to backend server
and generate CloudFlare or AWS's object storage URL, I used UrlField (opens in a new tab).
choices
For sex, I used choices (opens in a new tab) property,
and set default (opens in a new tab) option to be MALE.
__str__()
I overrid __str__() (opens in a new tab)
in order to show username on Django admin panel.
Adding Model Method
We can produce the wanted customized value by creating model method.
I called get_full_name() (opens in a new tab) method
saved in AbstractUser for getting full name of user.2
AUTH_USER_MODEL
Finally, I put users.User in AUTH_USER_MODEL (opens in a new tab)
so that we can tell Django that we actually replaced with the customized User model.
Below code should be added in settings.py file within our project root folder.